Hey there, Halloween enthusiast! I get it, you want your place to look fabulously spooky, but you also don’t want to spend your entire weekend (or your entire paycheck) making it happen. Who has the time?
The good news is that amazing Halloween Decorations don’t have to be complicated.
I’ve rounded up my favorite quick wins that will have your home looking perfectly eerie for Fall in, like, few minutes tops.
Let’s get into it.
1. Floating Witch Hats

This has to be one of the easiest illusions to pull off, and it always gets a reaction. All you need are some cheap witch hats and clear fishing line. Hang them at different heights from your porch ceiling or a tree branch.
Why it works:
- It creates an instant, mind-bending talking point.
- The movement from a slight breeze makes them look genuinely magical.
- It uses vertical space, which most people forget about when decorating.
- It’s seriously cheap and reusable year after year.
Pro Tip: If you don’t have fishing line, clear thread or even thin, clear tape can work in a pinch. Just don’t blame me if you have a slight sticky residue to clean up later!
2. Ghostly Tissue Specters
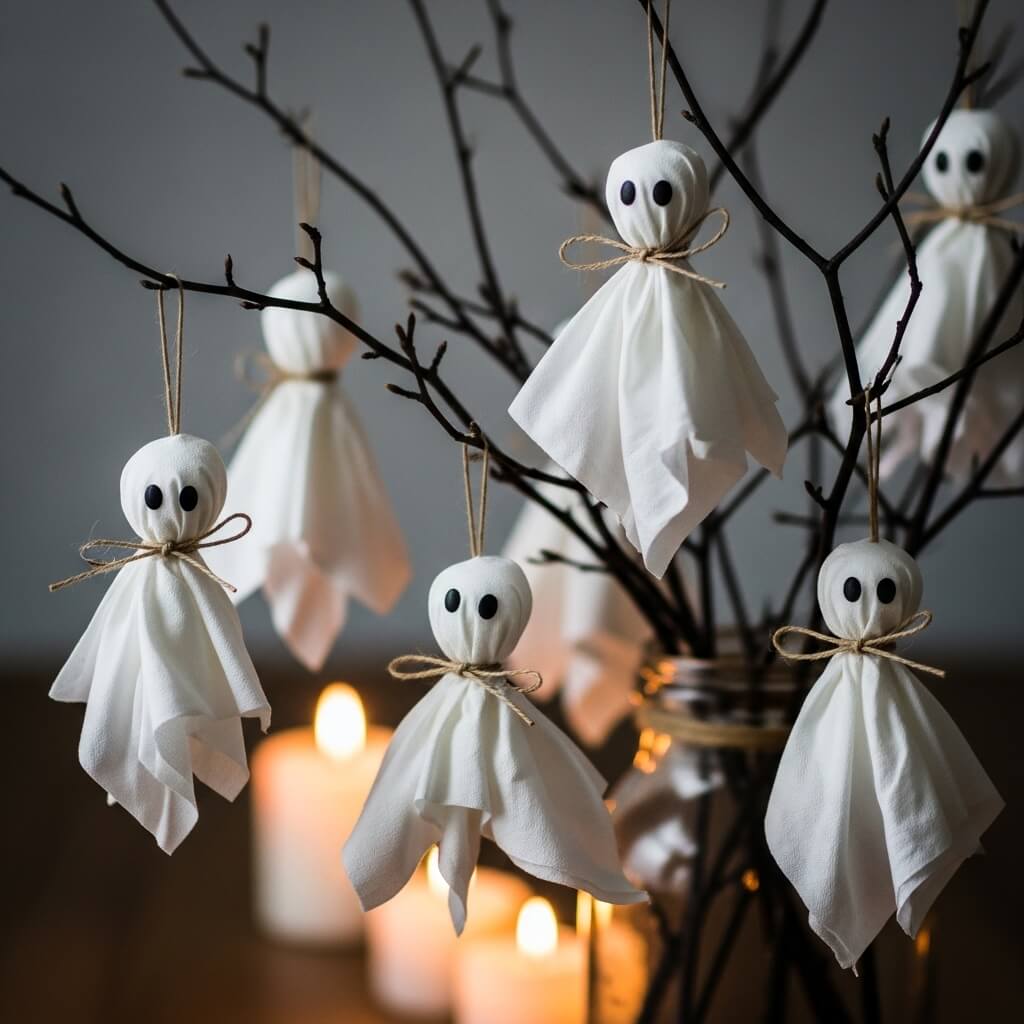
Don’t throw out that leftover tissue from gift bags! Grab a few tissues, some string, and a marker. Ball up one tissue for the head, drape another over it, and tie the string around the “neck” to define it. Draw on two little eyes.
How to nail it:
- The crumpler the head, the more character your ghost has.
- Use a grey or black marker for a subtler, spookier look.
- Dangle a few from a bare branch in a vase for an instant centerpiece.
Personal fave: I make a whole family of these every year with my kids. Their lopsided eyes are honestly cuter (and creepier) than anything store-bought.
3. Beware of Spider Web Entryway
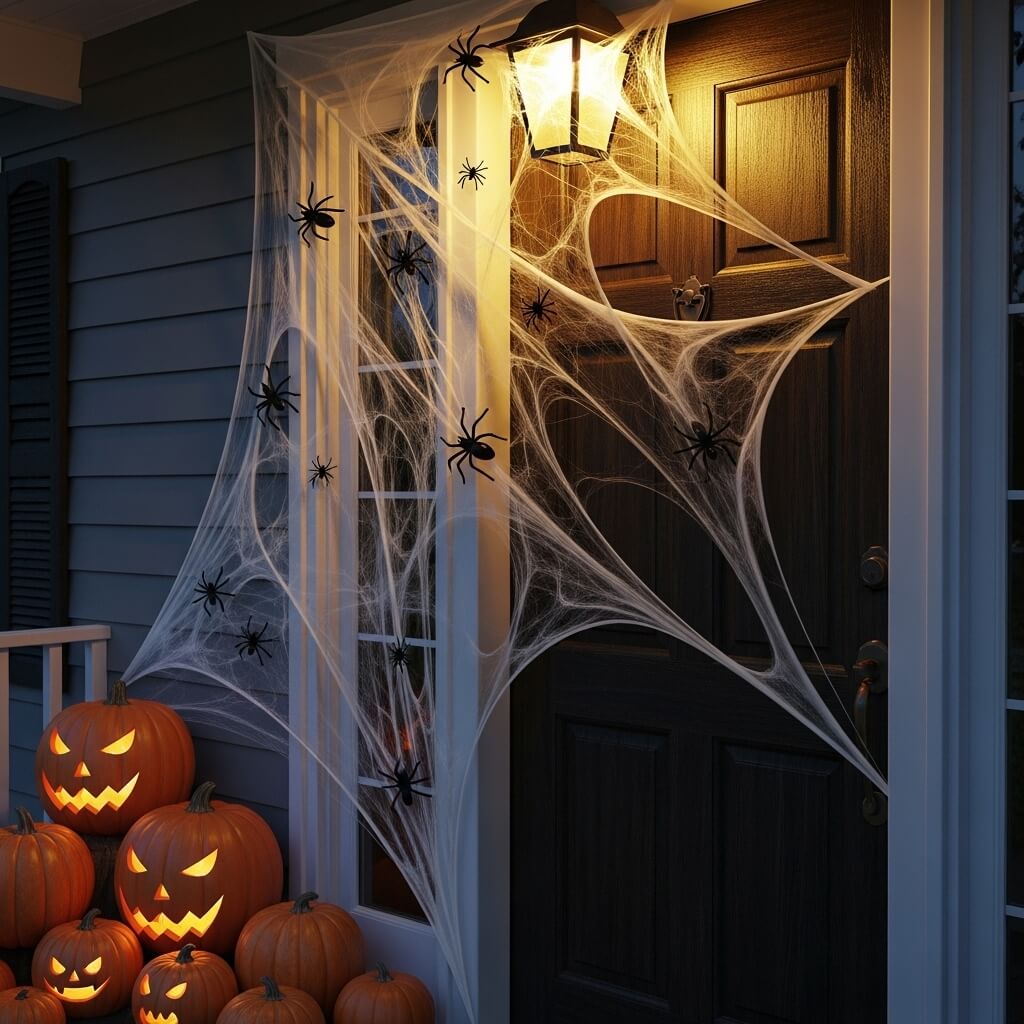
We’ve all got that bag of stretchy spider web stuffing tucked in a Fall decor box. Instead of just draping it haphazardly, focus your efforts. Stretch a generous amount across one corner of your front door frame and dot it with plastic spiders.
Why it’s a must-try:
- It’s the very first thing guests see, setting the tone immediately.
- It takes literally 60 seconds but looks like you put in real effort.
- You can make it as dense or as wispy as you want.
Pro move: Hit the webs lightly with a hair dryer on a cool setting to make them look extra wind-blown and authentic.
4. Jack-O’-Lantern Mason Jars
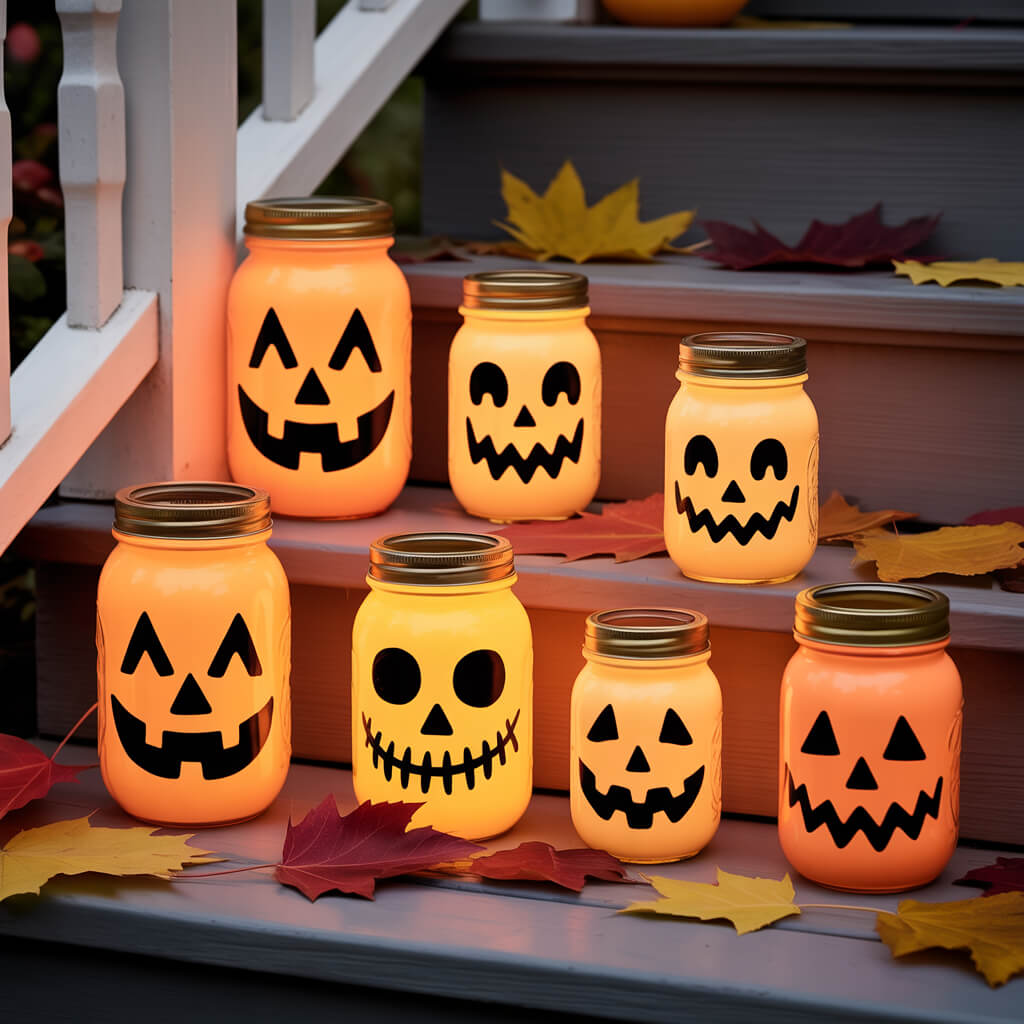
Have a few empty pasta sauce or mason jars hanging around? Clean them out, draw a simple jack-o’-lantern face with a black permanent marker, and pop a battery-operated tea light inside. Boom. Instant, safe ambiance.
Why this idea:
- It’s a fantastic way to upcycle jars you’d probably recycle anyway.
- Battery-operated candles mean zero fire hazard for indoors or out.
- You can make a whole squad of them with different expressions.
Downside: The marker can sometimes smear if the jar is damp. Just make sure it’s completely dry before you start drawing!
5. The Sinister Silhouette
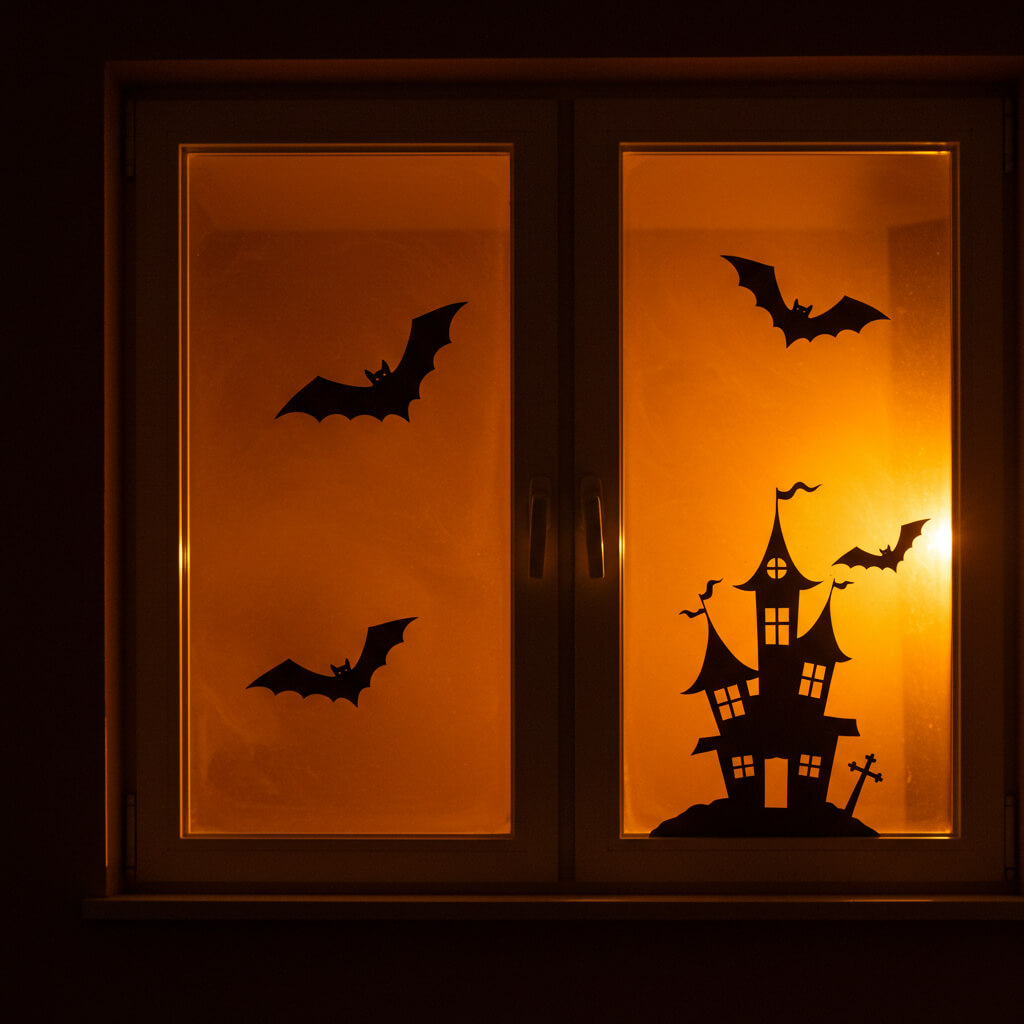
Black poster board or construction paper is your best friend. Cut out simple shapes like bats, cats, or a creepy haunted house. Tape them to your windows, and let the sun (or your indoor lights) do the rest.
How to make it spooky:
- Keep the shapes simple; intricate details get lost.
- For a bonus effect, layer multiple bat silhouettes to look like a swarm.
- This is a classic for a reason—it’s incredibly effective and free if you have the supplies.
Story time: I once cut out a giant spider silhouette and put it in my second-story window. My neighbor texted me asking if I knew there was a “terrifyingly large shadow” on my house. Mission accomplished.
6. Mummy-Fied Everything
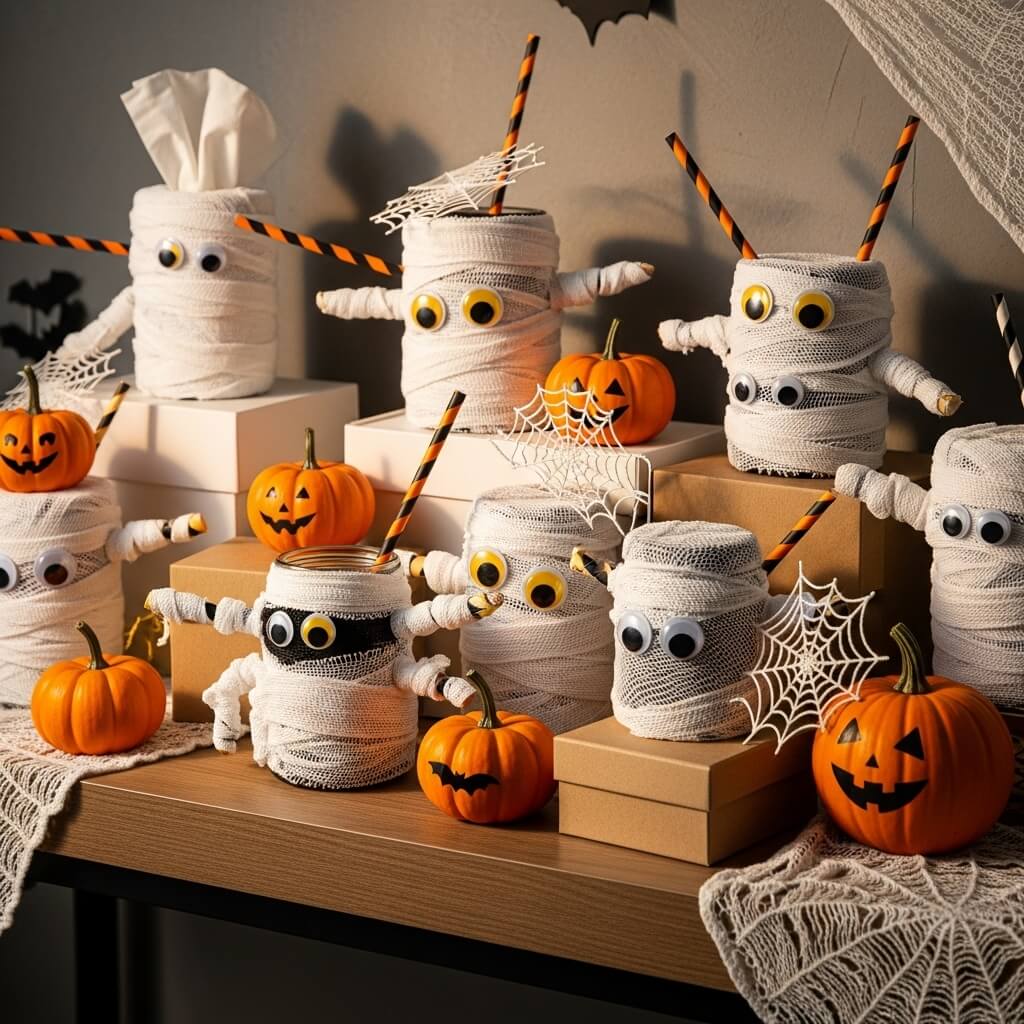
Gauze or cheap white streamers? Check. Googly eyes? Check. You can mummy-fy anything in your house. I’m talking tissue boxes, vases, water bottles, even your toilet paper roll. Just wrap and stick on the eyes.
Why it works:
- It adds a playful, not-too-scary vibe that’s perfect for all ages.
- You can transform boring everyday objects into themed decor.
- It uses up leftover craft supplies you might already have.
Personal take: I mummy-fy a few jars every year to hold pens or candy. They’re so silly they always make me smile.
7. Creepy Crawly Ice Cube Candles
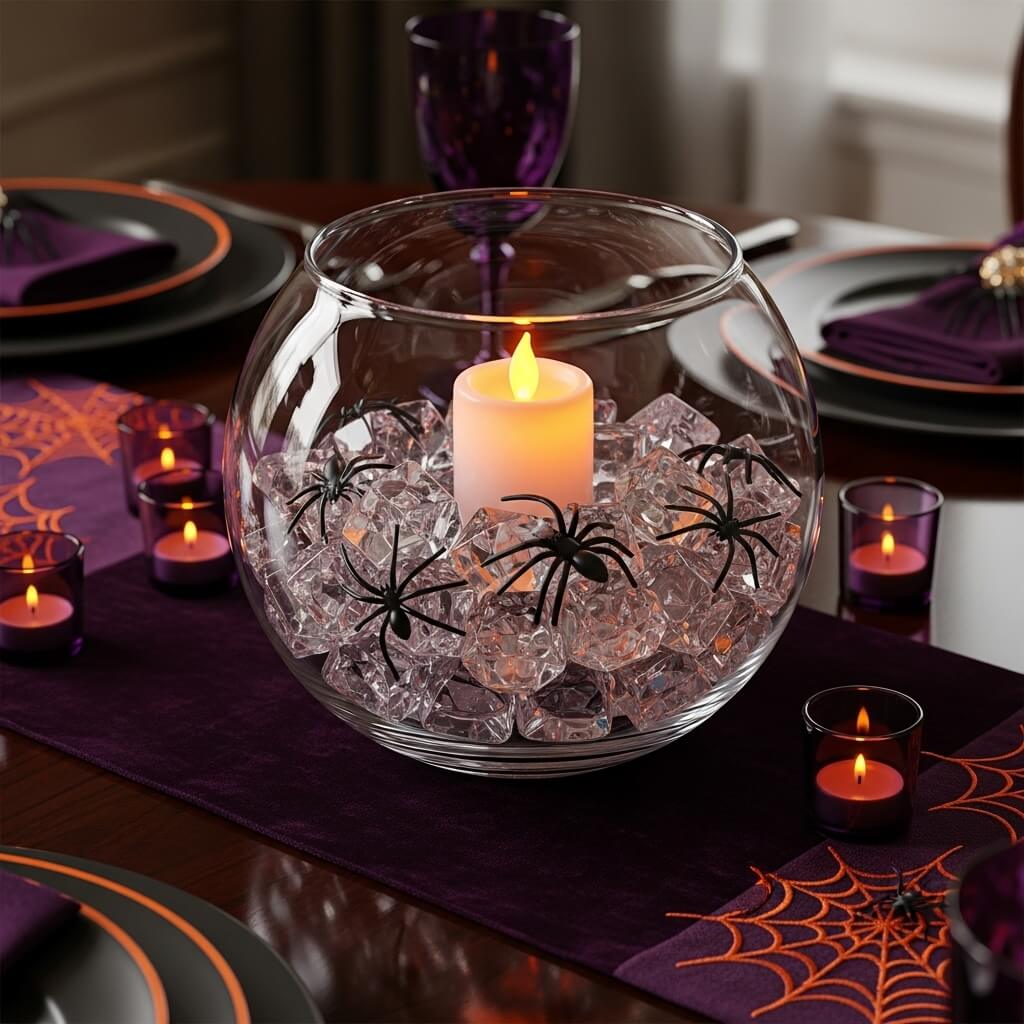
This one is a serious crowd-pleaser. Grab a clear glass bowl or vase, fill it with plastic spiders or bugs, and then top it off with those fake ice cube gems from the dollar store. Nestle a battery-operated candle in the middle.
Why it’s a must-try
- The light catches the “ice” and makes it glitter beautifully.
- It looks like a sophisticated, expensive decoration but costs pennies.
- The bugs hidden inside are a fantastic, subtle surprise.
Pro Tip: Mix in a few orange or purple gems to really tie it into the Halloween color scheme.
8.Bloody Candlestick Hack
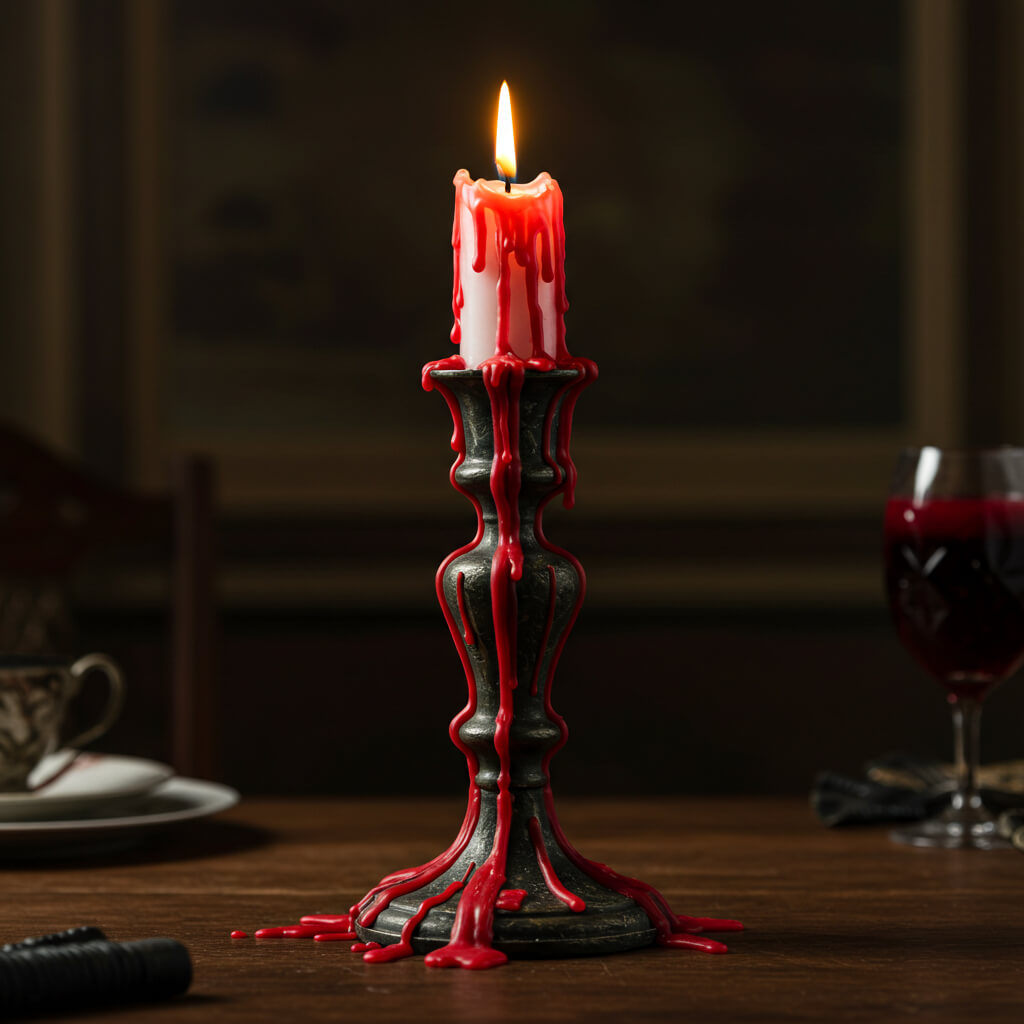
Take any classic candlestick you have—brass, glass, it doesn’t matter. Drip red hot glue or even red nail polish down the sides to make it look like blood. It’s gross, it’s gory, and it’s genius.
How to nail the gore:
- For hot glue, work quickly before it sets to pull out some stringy drips.
- Nail polish is more permanent, so maybe don’t use your heirloom silver.
- This adds a seriously eerie touch to a normal dining table setup.
Pro move: Add a few drips onto the candle itself for an extra layer of ick.
9. “Boo” Banner with a Twist

Forget complicated crafts. Cut some triangles out of black paper or cardstock. Write letters on them with a white paint pen or crayon to spell “B-O-O” or “E-E-K”. Punch holes in the corners and string them together with yarn or twine.
Why this idea:
- It’s a quick and personal way to add a festive banner to your mantel or doorway.
- You can get the kids involved in decorating the letters.
- It’s flat, so it stores easily for next year.
Personal fave: I like to rough up the edges of the paper and smudge the writing a little to give it a vintage, haunted feel.
10. Haunted House Window Reflection

Turn your TV or a large computer monitor into a decor piece. Just pull up a YouTube video of a looped, animated haunted house scene or a flickering fireplace. It casts a seriously spooky and atmospheric glow throughout the whole room.
Why it works:
- It’s 100% free and uses tech you already own.
- The moving light creates a dynamic, eerie ambiance that static decor can’t match.
- You can change the scene anytime you want. Creveyard one night, floating ghosts the next.
Downside: You can’t, you know, watch the game while it’s on. But IMO, setting the mood is more important for the holiday.
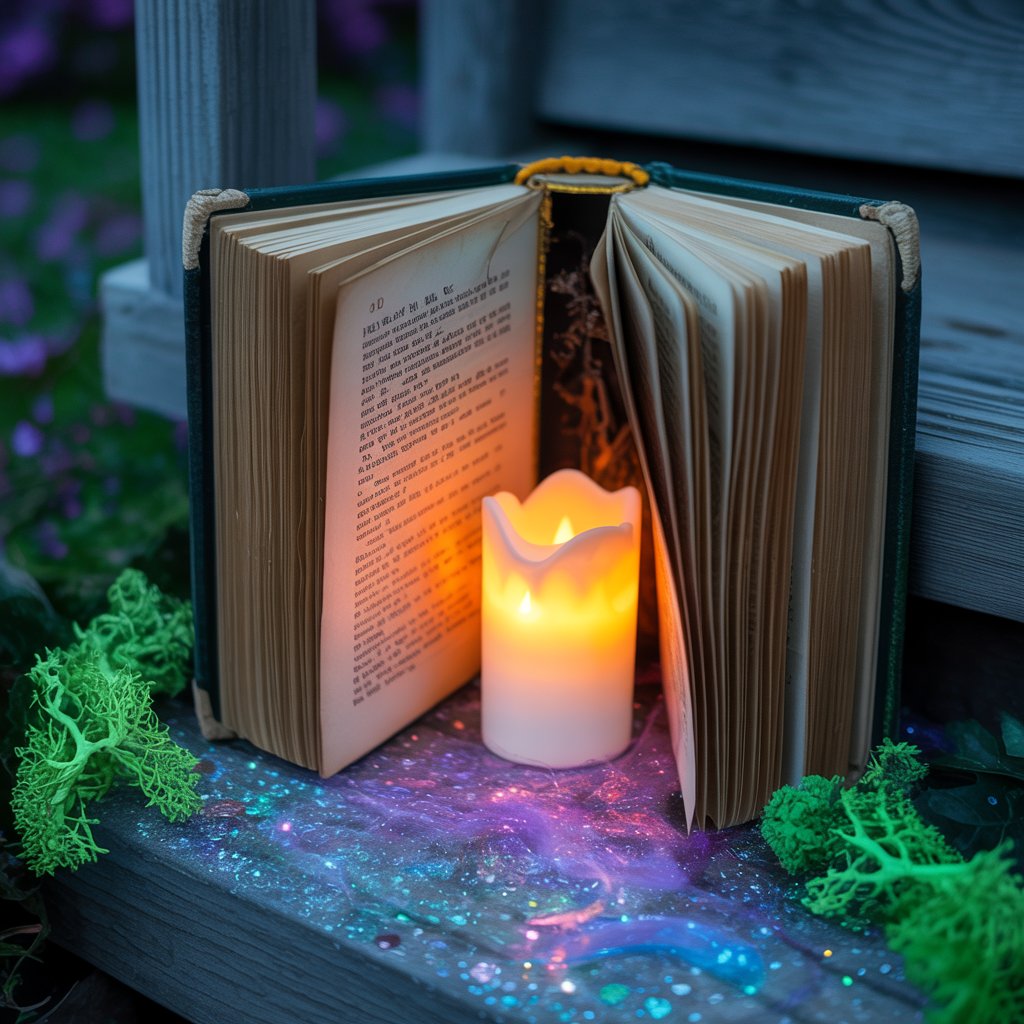
11. Spellbook Portal

Grab an old book you don’t mind sacrificing (thrift stores are great for this). Hollow out the inside pages with a craft knife or just roughly tear them out. Glue the cover to a base if you want it to stay open. Place it on your doorstep with a battery-operated candle glowing inside.
How to create the illusion:
- Rough, torn pages look much more authentic than neatly cut ones.
- You can write spooky words on the pages with a metallic pen before gluing.
- It looks like a portal to another dimension just opened on your porch.
Pro move: Sprinkle a little glitter or fake moss around it to make it look ancient and magical.
12. Ghostly Sheet Music
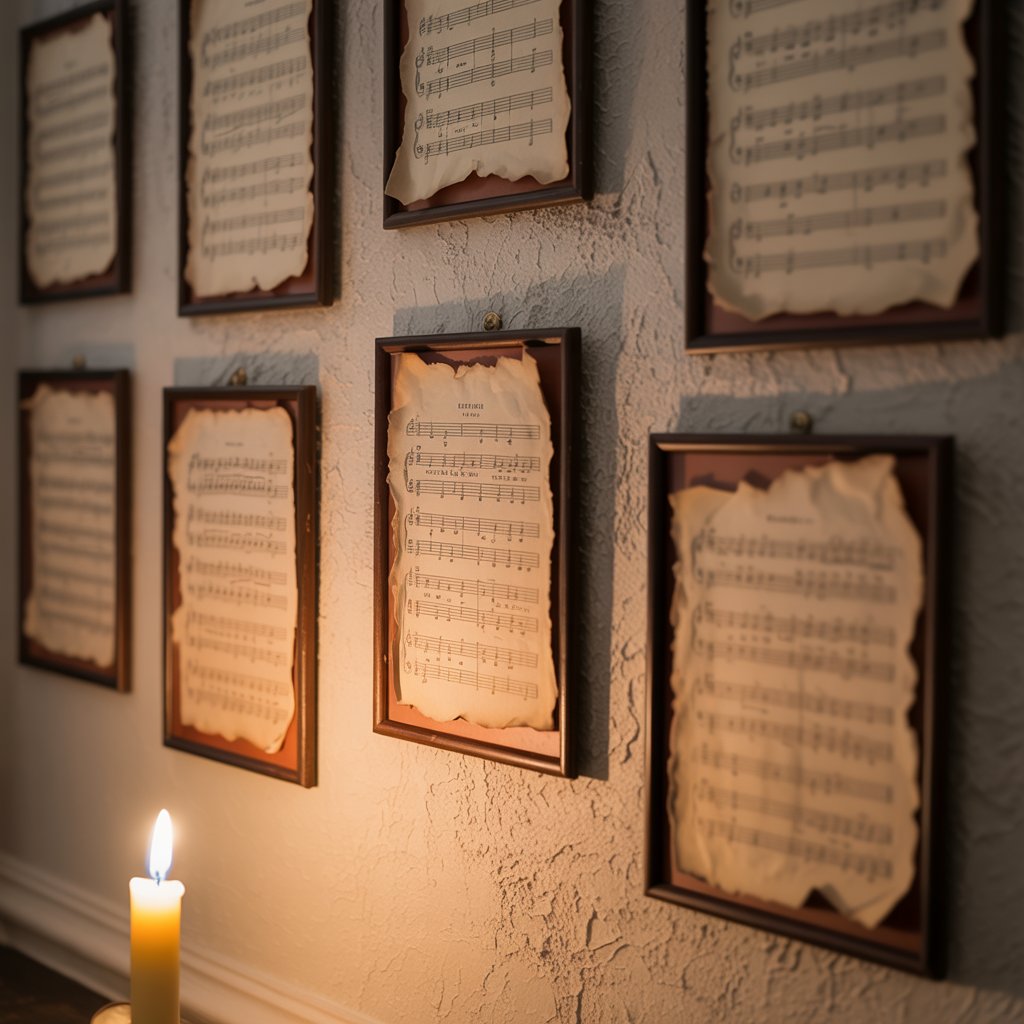
Find some free, vintage-looking sheet music online and print it out. Crumple the pages up, then smooth them out again. Tape them to your walls or frame them for an instant, elegant yet spooky gallery wall.
Why it’s a must-try:
- It appeals to the “classy horror” aesthetic perfectly.
- The crumpling gives it an aged, abandoned feel instantly.
- It’s a super cheap way to fill a large wall space with themed decor.
Personal take: I use photocopies of actual Halloween song music, like “Monster Mash” or the Ghostbusters theme, for a fun hidden detail.
13. Glowing Eyeball Garden
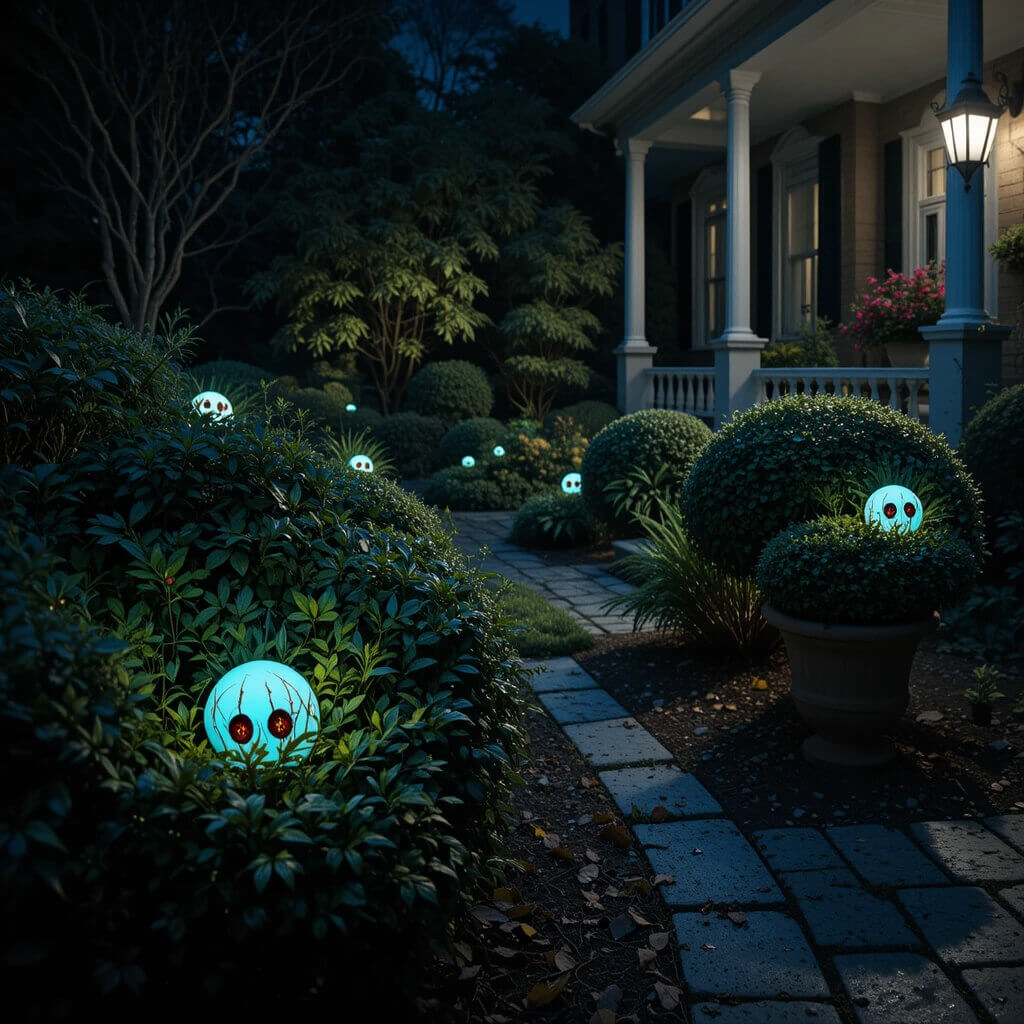
This might be the easiest one on the list. Buy a bag of those cheap plastic eyeballs. At dusk, head outside and simply toss them into your bushes, planters, or mulch beds. They’ll catch the light and stare back at your guests.
Why this idea:
- The sheer simplicity is brilliant. There is no setup.
- It’s a fantastic jump-scare for unsuspecting visitors.
- Cleanup is just as easy—go outside and collect them all.
Pro Tip: For extra creep factor, use a sharpie to draw veins or bloodshot lines on the white parts of the eyes.
14. Candy Corn Vignette
Embrace the kitsch! Fill a clear vase, apothecary jar, or even a cake stand with layers of candy corn. It’s instantly, unmistakably Halloween. For a non-edible version, use dyed rice or sand in yellow, orange, and white layers.
How to nail it:
- It’s a vibrant, colorful pop that screams holiday fun.
- If you use real candy, it doubles as a snack station (FYI, controversial opinion incoming: candy corn is delicious, fight me).
- It takes about 30 seconds to assemble and looks perfectly curated.
Story time: I use the same bag of candy corn for this for years. It’s basically decorative plastic at this point, which is probably for the best.
Wrap Up
See? I told you that creating a spooktacular atmosphere didn’t have to be a whole production. The magic of Fall and Halloween is all about those quick, clever touches that spark joy and a little bit of fear.
You don’t need a warehouse of supplies or a huge budget; you just need a few minutes and a little creativity. The best Halloween decorations often feel spontaneous and personal, like you’re in on a fun little secret.
My biggest advice is to just pick one or two of these that made you think, “Hey, I could totally do that right now.” Maybe it’s tossing some eyeballs in the bushes or drawing a silhouette for the window.
Once you get that first hit of “I made that!” pride, you’ll probably be itching to try another. I’d love to hear which quick project you tackle first. Let me know in the comments! Now go forth and decorate.